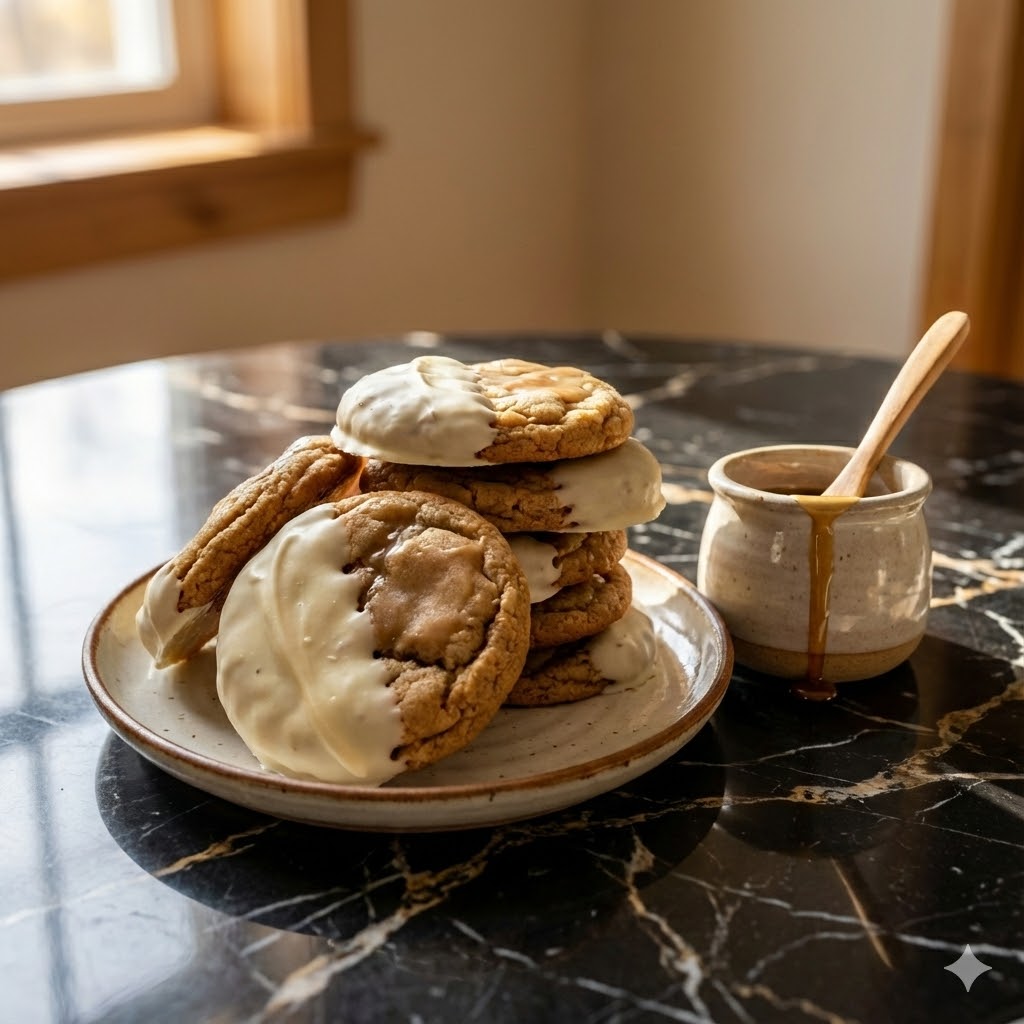
Warm, tender, and kissed with spice, these Cinnamon Eggnog Scones capture everything I love about winter mornings. This recipe began in my grandmother’s small kitchen, where cinnamon filled the air and eggnog sat ready on the windowsill. That blend of creamy richness and holiday spice always stayed with me.
Years later, while attending the French Pastry School, I decided to bring that memory to life in scone form flaky layers, crisp edges, and the warmth of cinnamon, made even more comforting by rich eggnog. These scones aren’t just baked goods they’re a story, a season, and a memory.
In this article, I’ll walk you through how to make Cinnamon Eggnog Scones from scratch, how to bake them to perfection, tips for making ahead, and the best ways to serve them. Whether you’re planning a holiday brunch or just want something warm with your tea, these scones will hit the spot.
A Holiday Morning Tradition
Growing up in my grandmother’s home, winter weekends were marked by the rhythmic sound of her wooden spoon against a mixing bowl. I’d wake to the scent of butter browning and spices blooming in the oven’s heat. These memories are what inspired my love for baking seasonal treats that bring people together around the table.
My journey with scones began rather unceremoniously when I was just twelve. My first batch was hard enough to use as doorstops! But Grandma, with her infinite patience, showed me how the magic happens in the details – cold butter, gentle mixing, proper spacing of the dough triangles. “Baking isn’t just about ingredients,” she’d say. “It’s about feeling the dough and knowing when it’s just right.”
These holiday-spiced scones became our tradition, evolving slightly each year as I added my own touches. The morning ritual of mixing, cutting, and baking while the house was still quiet became my meditation a moment of peace before the day’s celebrations began.
The Heart of Holiday Baking
There’s something profoundly nostalgic about the combination of cinnamon and eggnog. These flavors transport us back to childhood kitchens, to moments gathered around the table with loved ones. The recipe I’m sharing today carries echoes of those traditional Christmas morning breakfasts, yet stands firmly as its own creation.
In many households, including mine, holiday baking isn’t just about feeding people – it’s about maintaining connections to our past while creating new memories. These scones have graced my table for family gatherings, [holiday brunches with friends](/holiday-brunch-menu-ideas), and quiet mornings when I simply wanted to treat myself to something special.
The practice of baking these scones has become as important as enjoying them. The methodical cutting of butter into flour, the careful folding of the dough – these actions ground me during the often chaotic holiday season. They remind me to slow down and appreciate the process, not just rush toward the finished product.
What began as my grandmother’s simple recipe has transformed over the years, incorporating influences from my travels through European bakeries and experiments with different spice combinations. Yet at its heart, it remains a testament to the power of food to connect us across generations.
The Magic of Seasonal Ingredients
Quality Makes All the Difference
The beauty of these holiday scones lies in their simplicity, which means the quality of each ingredient truly matters. Start with all-purpose flour – I prefer unbleached for its slightly better flavor. The star of the show, however, is the butter. Use the highest quality unsalted butter you can find, preferably European-style with higher fat content. This creates those beautiful, flaky layers that define a perfect scone.
For the spice blend, freshly ground cinnamon makes a noticeable difference. I buy cinnamon sticks and grind them myself in a dedicated spice grinder. The aroma is intoxicating and the flavor more vibrant than pre-ground versions. Pair this with freshly grated nutmeg (never the pre-ground variety if you can help it) and a touch of ground cloves.
The eggnog element comes from both actual eggnog in the dough and in the glaze. Look for full-fat, high-quality eggnog without artificial flavors. In a pinch, you can make a quick homemade version by combining heavy cream, egg yolks, sugar, and nutmeg. For those who prefer non-dairy options, there are several excellent almond and coconut-based eggnogs available that work wonderfully in this recipe.
When it comes to sugar, I use fine granulated sugar in the dough itself, but the glaze benefits from confectioners’ sugar for that smooth, pourable consistency. A final sprinkle of turbinado sugar before baking gives the tops a delightful crunch and sparkle.

Essential Tools and Techniques
The beauty of scone-making lies in its simplicity – you don’t need fancy equipment, but a few key tools will make the process smoother. I rely on a large mixing bowl, preferably one with steep sides for easy mixing. A pastry blender or two butter knives will help you cut the butter into the flour without overworking the dough.
A well-seasoned baking sheet lined with parchment paper ensures even baking and prevents sticking. While not essential, a bench scraper helps greatly when transferring the cut scones to the baking sheet and cleaning up your work surface afterward.
Temperature control is crucial for perfect scones. I keep my butter in the freezer for about 15 minutes before starting, then grate it directly into the flour mixture. This technique, which I learned from a [Scottish baker during my culinary travels](/traditional-scottish-baking), ensures those perfect pockets of butter that create flaky layers.
For mixing, remember that a light touch is essential. Overworking the dough activates gluten, resulting in tough scones. I use a wooden spoon to gently combine the wet and dry ingredients, then switch to my hands for just a few turns to bring the dough together.
If you’re new to making scones, consider investing in a simple round cutter or using a sharp knife to create traditional triangles. Clean cuts are important – avoid twisting the cutter, which can seal the edges and prevent proper rising. For those without specialized equipment, a works wonderfully.

Bringing It All Together
Creating Perfect Holiday Scones
Let’s walk through making these Cinnamon Eggnog Scones step by step. First, preheat your oven to 425°F and line a baking sheet with parchment paper. In a large bowl, whisk together your dry ingredients – flour, baking powder, salt, sugar, and those warming spices that define the flavor profile. Next, add your frozen grated butter, working quickly to keep everything cold. Using your fingertips, lightly toss the butter with the flour mixture until it resembles coarse crumbs with some larger pieces remaining.
In a separate bowl, whisk together the wet ingredients eggnog, egg, and vanilla extract. Make a well in the center of your dry ingredients, then pour in the wet mixture. Using a fork, gently stir until the dough just begins to come together. The mixture will look shaggy and somewhat dry – this is exactly what you want. Turn the dough onto a lightly floured surface and knead very gently just 3-4 times to incorporate any loose pieces.
Pat the dough into a circle about 3/4-inch thick. Using a sharp knife, cut the circle into 8 wedges, then transfer them to your prepared baking sheet, leaving about 2 inches between each scone. Brush the tops with a little extra eggnog and sprinkle with turbinado sugar. Bake for 12-15 minutes until golden brown.
While the scones cool slightly, prepare your eggnog glaze recipes by whisking together powdered sugar and eggnog until smooth. The consistency should be thick but pourable – adjust with more sugar or eggnog as needed. Drizzle over slightly cooled scones and allow to set before serving.
Common Pitfalls and How to Avoid Them
The most frequent mistake when making scones is overworking the dough. Remember, we’re not looking for a smooth, elastic dough like bread – scone dough should be shaggy and just barely holding together. Over-mixing activates the gluten in the flour, resulting in tough, dense scones instead of tender, flaky ones.
Temperature control is equally important. Keep everything cold – I even chill my mixing bowl and flour in the refrigerator before starting on particularly warm days. If at any point your butter begins to soften too much, pause and refrigerate the mixture for 15 minutes before continuing.
Another common issue is incorrect oven temperature. Most home ovens run either hot or cold, so an oven thermometer is a worthwhile investment. Scones need that initial blast of high heat to rise properly and develop their characteristic texture.
If your scones spread too much during baking, the dough was likely too wet or the butter too warm. Conversely, if they’re dry and crumbly, you may have added too much flour or not enough liquid. Finding the perfect balance comes with practice and understanding dough hydration.
Enjoying Your Seasonal Creation
Perfect Pairings and Serving Ideas
These spiced scones are versatile enough to serve in multiple settings. For a special holiday breakfast, present them still slightly warm, with the glaze just set, alongside a bowl of winter fruits and berries. The contrast of tart fruit with the sweet, spiced scones creates a beautiful balance.
Coffee is the traditional pairing, and for good reason – a medium roast with caramel notes complements the cinnamon and eggnog flavors perfectly. For something special, try a dash of eggnog in your coffee instead of cream. Tea drinkers will find that a robust black tea or chai enhances the spice notes in the scones.
These scones shine at holiday brunches where they can be part of a larger spread. Consider serving them alongside savory options like a winter vegetable frittata or smoked salmon with capers. The sweet-savory contrast works beautifully for late morning gatherings.
For a more decadent dessert approach, warm a scone slightly and top with a small scoop of vanilla ice cream or whipped mascarpone cheese. A drizzle of caramel sauce takes this simple pastry into spectacular dessert territory.

Storage Tips and Variations
Scones are best enjoyed the day they’re baked, but you can extend their life with proper storage. Keep completely cooled scones in an airtight container at room temperature for up to two days. To refresh them, warm in a 300°F oven for about 5 minutes.
For longer storage, freeze unbaked scone wedges on a baking sheet, then transfer to a freezer bag once solid. They can be baked directly from frozen, adding just a few extra minutes to the baking time. This method ensures you can have freshly baked scones whenever the craving strikes.
The basic recipe lends itself to several variations. For a dairy-free version, substitute the butter with cold coconut oil and use a plant-based eggnog alternative. The texture will be slightly different but still delicious. Those avoiding gluten can use a cup-for-cup gluten-free flour blend, though you may need to add an extra tablespoon or two of liquid as gluten-free flours tend to absorb more moisture.
Add dried cranberries or chopped crystallized ginger to the dough for extra flavor dimensions. White chocolate chips make a decadent addition that pairs beautifully with the eggnog flavor profile. For those who enjoy nuts, toasted pecans add wonderful texture and a complementary flavor.
Frequently Asked Questions
Can I make the dough ahead of time?
Yes, you can prepare the dough up to the point of shaping and cutting, then refrigerate overnight. Place the cut scones on a baking sheet, cover with plastic wrap, and refrigerate. The next morning, preheat the oven and bake directly from the refrigerator. You may need to add 1-2 minutes to the baking time.
Why did my scones turn out tough instead of tender?
Tough scones usually result from overworking the dough or using too much flour. Remember to handle the dough minimally – just enough to bring it together. Also, measure your flour by spooning it into measuring cups and leveling off, rather than scooping directly with the measuring cup, which compacts the flour.
Can I use regular milk instead of eggnog?
While you can substitute milk for eggnog in the dough, you’ll lose some of the characteristic flavor. To compensate, increase the nutmeg to 1/2 teaspoon and add 1/4 teaspoon of vanilla extract. For the glaze, consider adding a drop of rum extract to milk-based glaze to mimic eggnog’s flavor profile.
My scones didn’t rise well. What went wrong?
Several factors affect rise: your baking powder might be old (replace it every 6-12 months), the oven temperature might be too low, or the dough might have been overworked. Also ensure you’re making clean cuts without twisting your cutter or knife, as twisting can seal the edges and prevent proper rising.
Baking Memories, One Scone at a Time
As winter wraps us in its chilly embrace, there’s something deeply satisfying about creating warm, spice-filled treats in our kitchens. These Cinnamon-Eggnog Scones aren’t just pastries they’re vessels for creating memories around your table. The gentle process of bringing together butter, flour, and spices becomes a meditation on the simple joys of the season.
Whether you’re an experienced baker or trying your hand at scones for the first time, I hope this recipe becomes part of your own holiday tradition. The beauty of baking lies not just in the perfect result (though that’s certainly rewarding!) but in the process itself the tactile pleasure of working with dough, the anticipation as the aroma fills your home, and the joy of sharing something made with care.
I encourage you to experiment with your own variations and make these scones truly your own. Perhaps you’ll add a different spice blend or create your own unique eggnog glaze recipes to match your family’s preferences. Whatever path you choose, may the process bring you as much joy as it has brought me over the years of developing and sharing this beloved recipe.
Print
How to Make 5-Ingredient Cinnamon Eggnog Scones
- Total Time: 35 minutes
- Yield: 8 scones 1x
- Diet: Vegetarian
Description
These Cinnamon-Eggnog Scones are flaky, warmly spiced, and rich with the flavor of creamy holiday eggnog. A perfect cozy treat for cold mornings or festive brunches.
Ingredients
2 cups all-purpose flour
1/4 cup granulated sugar
1 tbsp baking powder
1/2 tsp fine sea salt
1 1/4 tsp ground cinnamon
1/4 tsp ground nutmeg
1/2 cup unsalted butter, cold and cubed
1 large egg
1/2 cup eggnog (plus 1 tbsp for brushing)
1 tsp vanilla extract
Turbinado sugar for topping
Instructions
1. Preheat oven to 400°F (200°C). Line a baking sheet with parchment paper.
2. In a large bowl, whisk together flour, sugar, baking powder, salt, cinnamon, and nutmeg.
3. Cut in the cold butter using a pastry cutter or fingertips until mixture resembles coarse crumbs.
4. In a small bowl, whisk together egg, eggnog, and vanilla extract.
5. Pour wet mixture into dry and stir just until combined. Do not overmix.
6. Turn dough onto a floured surface. Gently pat into a 1-inch thick disk.
7. Cut into 8 wedges and place on baking sheet.
8. Brush tops with eggnog and sprinkle with turbinado sugar.
9. Bake for 18–20 minutes, until golden brown and baked through.
10. Cool slightly and serve warm or at room temperature.
Notes
These scones are best enjoyed fresh but can be stored in an airtight container for up to 2 days. For a crisper top, reheat briefly in the oven. You can freeze unbaked scones and bake directly from frozen, adding 3–5 minutes to baking time.
- Prep Time: 15 minutes
- Cook Time: 20 minutes
- Category: Breakfast, Brunch
- Method: Baking
- Cuisine: American
Nutrition
- Serving Size: 1 scone
- Calories: 285
- Sugar: 10g
- Sodium: 220mg
- Fat: 14g
- Saturated Fat: 8g
- Unsaturated Fat: 5g
- Trans Fat: 0g
- Carbohydrates: 36g
- Fiber: 1g
- Protein: 4g
- Cholesterol: 55mg